
(Again, pardon the 'a'. Some things can't be fixed in place.)
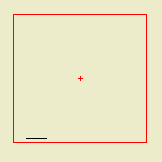
This object represents the available area of a detail sheet grid cell, or group of cells. Use it in your details to plan how the detail will lie in the cell. Very similar to Sheet Area RND10, which is used for plans.
Sheet Size Should be clear enough.
Standard Grid: Each size has a standard number of horizontal and vertical cells. Most detail sheets will use the default. Usually, keep this on. If you need to use a custom grid, turn it off and set the Horizontal & Vertical Sheet Divisions manually.
Horizontal & Vertical Cells: How many cells are covered by the current instance of the object. The 'sheet divisions' limit the number of cells that are available. Within that, you can use multiple cells for large details, or to align separate, related details in one window.* Most of your grid objects will be 1x1.
If you use a grid larger than 1x1, you can choose to display the Interior Grid Lines for guidance.
Note Column Lines: A pair of lines on the right side to help align text blocks and labels. There are parameters for the width of the column and the margin on the right side. For a multi-celled grid, you can choose to turn on the columns in All Cells. Use this for the separate details scenario.*
Title Dist(ance): The object draws a thin, visible line in the lower left corner for the purpose of placing the drawing title in the layout. This parameter is the distance above the bottom of the object. Move the drawing's title so the left end is at the left end of the line. To turn the line off, set the distance to zero. Otherwise, you will usually leave this parameter alone. Title All Cells places a guide in each cell in a multi-celled grid, for separate details.
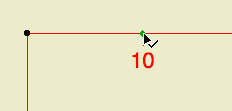
Alignment Ticks: To help place the object consistently in several details, so the details line up in the layout. There are ticks on the center of each side. There is also a custom alignment tick that you can set graphically. Set the same number in the windows of adjacent details.
Grid Margin: Leave this on, almost always. The margin makes the rectangle slightly (0.03") smaller than the 'real' grid cell in the layout, on all sides. This ensures that the drawing won't accidentally mask the layout's grid lines. The only time I turn it off is to set up the 'imaginary' grid for the assembly type details. More on this later.
Normal Use of the Object: Place the object so that the detail is centered, or so that you get the desired alignment. When you place the detail as a drawing, the frame will fit to the object. (I assume 'Fit Frame' is on, which it should be for details.)
For a one-cell detail, drag the drawing by the center node and snap it to the node in the center of a grid cell. For multi-celled details, use any of the center hotspots within the detail to snap to the grid centers. Note: Make sure you grab the center of the little cross.
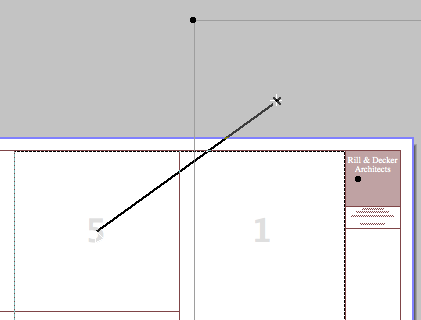
There should be an arrow cursor next to the '5'
That's it.
* I don't place multiple details in a window very often. I'm tempted to say never, but I will resist. If you place multiple details, you need to place titles manually in the window for each drawing, and the referencing will not be automatic. Not ideal, but I can imagine cases where it would be manageable.