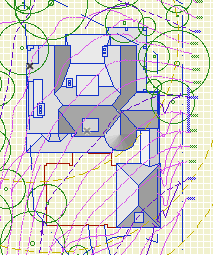
This is a non-destructive method for creating a grayscale, shaded, top view of a model, for placement in a site plan. It uses a second project file with redefined material colors. In order for this to work you need a range of grayscale pens. The more pens in this range, the richer the image. In our templates we have fifty.
Steps:
1. Make a new project. Use settings of latest project, launch new instance of AC.
2. Set up the stories to match the main project. For some reason the 'latest project' settings don't include this.
3. Save with a name like '[Project] for roof plan.PLN'. Put it in 1 Design / Modules.
4. Hotlink the model's project file into the new project.
5. Set up the 3D window with top view, internal engine, shaded. Turn off the undesired layers. There's a layer combination 'x Shoot Roof Plan'; that's a good place to start. Most of the visible elements will be on A Roof2, A Deck2, A Fireplace, etc.
6. And, most of the visible polygons will be of a handful of materials. Determine which materials these are.
7. In Attributes -> Materials, redefine all these materials to the same gray color. (Try 75%.) You only need to change the main material color.
If you don't see the color changes right away, try updating the hotlink. As you gray-ify materials, you might see more that need to be done.
The trick here is that there's no damage to the materials in the main project.
There's your gray model. I can think of at least three ways to get it back in the main project.
• Save a 3D view of the gray model, and place that view as an external drawing on top of the site plan. Pro: It's direct. Con: Tricky to line up with site plan drawing. External updates increase overhead, and at the moment they're buggy in 11.
• In the gray project, copy and paste from the 3D window to a detail window. Save a view from there and place as an external drawing on top of the site plan. Pros: You can edit the 2D image to erase elements or change line weights. The 2D drawing is more detectable and easier to line up with the site plan. External updates of 2D views run faster and more reliably. Con: Copy, paste, and subsequent editing needs to be done over if the model changes.
(Note: Shaded fills in the 3D window can use the full range of RGB. When you paste into a 2D window, you get solid fills of the pen color closest to the color in 3D. So the more grays you have available, the more variation you get in the image.)
• Copy and paste to a detail window as above, then save a module of the lines and fills. Hotlink the module into the site plan in the model environment, using a site annotation layer to control visibility. Pro: Visible in model environment, no second drawing to align in the layout. Updating hotlinks does not need a second session of AC, so it's faster. Con: Copy, paste, and subsequent editing needs to be done over if the model changes.
All three methods require that you open the gray project in order to modify the content. There's no way for the gray project to know the model has been modified and the hotlink needs to be updated.
I'm using the third one. A 3D external drawing is a big chunk of overhead. Both view solutions require an additional drawing in the layout, and the shaded content isn't visible in the model environment. Editing the lines and fills is an extra step, but it also looks better.The external 2D drawing and the hotlink give the same graphical result, but the hotlink update is faster.
If you ever need to update the image for changes in the model, all you need to do is:
• Save the main project, open the gray project, and update the hotlink.
• Re-copy and paste to the detail window. Mess with the lines again as needed.
• Select, copy, save as module from clipboard, write over the existing one.
• Back in the main project, update hotlinks.

