Update: In AC10, they made some changes to wall cleanup that simplify this process quite a bit.
Yes. Perfect. If you're into that sort of thing. It takes some doing.
In this example, I haven't yet made the dormer roof real. That's easy.
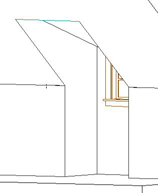
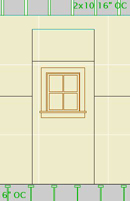
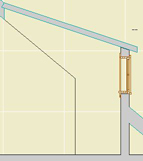
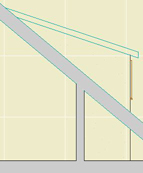
The hard part is getting all the walls to clean up in plan, elevation, and two sections. Everyone has struggled with this. This is the first time I've gotten all four drawings right at the same time.
For the steps, I will assume you already have an imperfect dormer placed, with three exterior walls, two high walls, at knee wall on each side, a parent roof, and a dormer roof.
1. The parent roof: Use true thickness, how about 10". If you change the thickness, make sure you elevate the roof down so the top plane is unchanged. Do this in section. The underside material must be the wall material.
2. Trim the knee wall to the parent roof. Use the little-noticed 'Set wall/column top to highest point' option. Select the wall, type 't', then Copy. The 't' field value of this wall becomes very important.
3. Select the side exterior walls of the dormer, type 't', then Paste. This sets the side walls' height equal to the knee wall.
4. Select the high walls. Undo any existing roof trim. Type 'b', then Paste. This sets the bottom of the high wall to the height of the top of the side and knee walls. Adjust the walls so they reach the front wall of the dormer, extending over the side walls. While you're here, make sure the other end of the walls reaches the top of the dormer roof.
5. Trim the top of the high walls to the dormer roof. (Uncheck the highest point box.)
6. Trim the bottom of the high walls to the parent roof. But first! a) Drag the high walls away from the dormer hole, so they are over the roof itself. b) Set the thickness of the parent roof to zero. This lets you trim the walls to the bottom of the roof.
7. Restore the roof's thickness, and put the side walls back in place.
8. Take a look.

Nice

Section

Section

Elevation
