With Gravity on, you can placed associated Level (Z-elevation) Dimensions on slabs, roofs, and meshes.

This guy.
(As with regular dimensions, the text can be customized, breaking the association. I use these on reflected ceiling plans, since you can't get gravity to detect the bottom of an element. A wish. (There might be a way to use a label for this, but I haven't tried.))
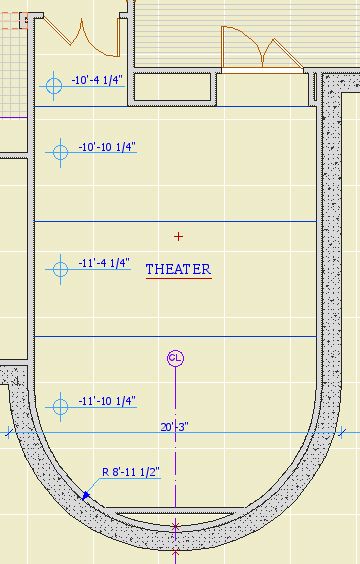
You should use associated Level Dimensions to show all the surface elevations in the project. Here's the slab stepping down in a theater:

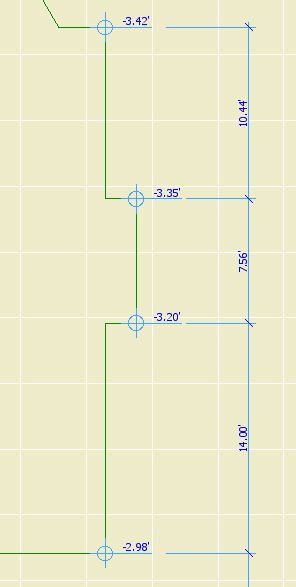
You can also put grade elevations on a site mesh. Here I used the house outline as a guide to show the elevations at the corners. I don't know whether we should actually do this, but it sure is easy. (Also, there should be a way to display sea level, but I can't find it.)
UPDATE: To show sea level, assuming you have it set properly in Working Units and Levels: After placing the dim, select the text. In the Info Box, click the flyout at Measured Value and choose Autotext. click the flyout to the right in the same tile and choose "to sea level". I didn't bother updating the picture, so you'll have to take my word for it.

To place an associated Level Dimension, activate the tool and turn gravity on for the desired target, by clicking the slab, roof, or mesh gravity button. Then just click on what you want to dimension.
If the dimension value is wrong, it's because gravity detected the wrong element. For example, you're trying to get the main floor deck elevation and gravity is finding the ceiling. Hide the layer of the element that's in the way.
Tip: If you select the Level Dim and hold the mouse button down, you can see what element it's associated with. (This works for regular dimension ticks too.) This helps you track down elements in the way. Select the interloper, then use the Quick Layers palette to hide its layer.
