Location: 06 Wood & Plastic / Railings & Stairs (I'm thinking about moving it, since it's not really a fine detail-type thing any more. More like a missing tool thing. Not to mention, it could be concrete. I really wish the object browser could handle aliases. As for now, there it lies.)
UPDATE: Stair Body JM9a is exactly like Stair Body JM9, but I added the story-sensitivity behavior from Railing JAM9. See below.
In honor of the story cuts, I also added an integrated cutline. It is simplified, and it still doesn't mask, but I'm working on that.
I also (now how much would you pay) added a Cover Fill Pen parameter, which simply allows the object to be opaque.
All this is identical to the JM9 post otherwise.
(Teaser futuristic update-to-be: I am already mostly done with Stair Body JM10, believe it or not. The big deal there is intelligent interaction with the new Floor Plan Cut Plane. Pretty cool.)
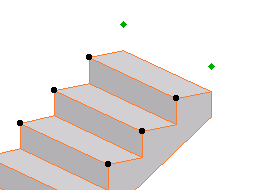
A very basic (in a good way) flight of stairs. An incremental improvement on Stair Stringer JAM8. You can still use it as a stringer; just make it thin. I changed the name because I use it more often for actual stairs.
Sidebar: There's a stair tool (Technically, the StairMaker add-on), which you should never use. Then there's ArchiStair by the very capable and friendly Cigraph, which is like a good StairMaker, only better.
I recently used an ArchiStair spiral stair for which I was very grateful, but generally I am skeptical of full-service add-ons for highly detailed building parts. No matter how many options, configurations, and details are offered, you will soon run into a custom situation where the add-on doesn't quite make it.
I would rather have more, simpler, separate elements. (Well, no, I would rather have one element do everything by magic, but it's not realistic.) If you run into a freaky custom railing, you can focus on that without wrecking the whole stair. And: In design development, you can show just a simple stair, leaving the details for later, where they (the details) belong.
This is consistent with a general principle of Archicad's design, our workflow, and how projects are actually built. Big, chunky stuff comes first: Walls, slabs, roofs, the basic geometry of stairs. Fine detail comes later, and is applied to the big stuff: Trim, finish floors, newels and railings.
So: The Stair Body object is like a slab tool for stairs.
Another major basic-yet-detailed building part is the chimney. See what I mean? End sidebar.
Now we can talk about the object.
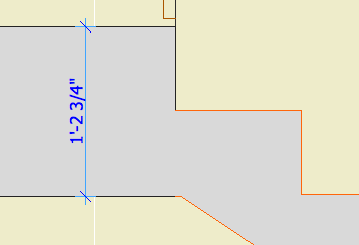
The Height goes from the top of the slab below to the top of the slab above (floor-to-floor). Likewise, the Length goes between the edges of the adjacent slabs. Note: The last physical riser is omitted, which means the visible object is one riser shorter than the object's actual height.

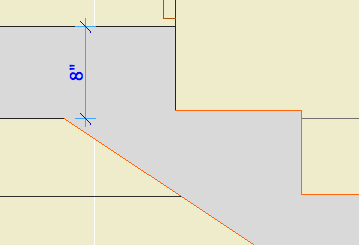
The Body Thickness is just that; the distance from a nose to the underside. The Upper and Lower Slab Thicknesses control how the object meets the adjacent slabs. Material will be added or subtracted accordingly.


To set the stair flat on the lower slab, set the Lower Thickness to zero.
Length, Height, Tread & Riser Quantity, Rise & Run: This gets complicated.
First off, treads and risers are bound together. Adding to one adds to the other, and vice versa. Risers are always treads plus one.
You can force the object's overall length and height to remain fixed as you add/subtract treads/risers or adjust the rise/run. To do this, turn the Lock Overall parameter on. Note that this doesn't freeze the dimensions; you can still stretch the object. If you change the quantities, the rise and run will change. If you change the rise and run, the quantities will change.
When editing the rise or run with the Overall Locked, you may (usually) end up with dimensions slightly different from those you entered. This is because: The object calculates the quantities based on the given rise/run, then recalculates the rise and run. It has to do this to keep the overall in its box. You should wind up with values near what you entered.
If Lock Overall is off:
• Adding a tread adds a riser, lengthens the object by one tread width, and makes it taller by one riser height. Adding a riser, ditto, since treads and risers are bound together.
• Changing the tread width changes the overall length. The new tread is multiplied by the tread quantity. The overall height and riser height are unchanged.
• Changing the riser height changes the overall height. The new riser is multiplied by the riser quantity. The overall length and tread width are unchanged.
When I started revising this object, I dreamed of having the rise and run restricted to a range, but that proved too challenging for my middling skillz. It's also the reason it took so long to get this revision out. Sorry on both counts.
Onward: The Angle Display shows the slope of the stair is degrees. It is not directly modifiable, it's for reference. For example, you can copy the angle and paste it into the roof you placed under the stair so you could have a panel.
(This is a good time to point out that you can copy and paste the rise and run values from the stair into the Railing JM9 object.)
In plan, you can choose to Show Treads or not, and choose an alternate pen for the treads. You can also show a line at the back of the base, and there's a dedicated pen for this too. It's white by default. This line helps locate the edge of the slab hole below, when the stairs stack.
The Cover Fill Pen is 91 by default. The fill is a true cover fill for the purpose of display options.
Generally, the object should be placed on A Stair2 or A Stair3, depending on whether you want it to show in plan. In many cases you can get away with showing it on at least one story, especially in DD. In the next version I would like to include some of the spectacular story display handling of Railing JM9. Not yet though.
UPDATE: Multi-story display. Either end of the stair can be cut back on home, above, and below stories, to accommodate cutlines. Once the top or bottom is cut, the cut distance can be edited in plan. A separate pen can be used for stories above and below, to distinguish among stairs. (2006-05-26)
UPDATE: Cutline. If cuts are shown on any story, you can choose to show a cutline. It has its own pen.(2006-05-26)

Stretching the Top cut; Look, a cutline.
The object is designed to be used in conjunction with RiserMeter JAM9. Short version: Figure out the riser height, place slabs for any landings, then place stair body objects between them. Remember the stairs go from top to top. Set the slab thicknesses correctly. It should work.
Original date: 2005-10-27
