Location: Like all markers, the location doesn't matter. Markers are selected directly in the settings dialog or info box.
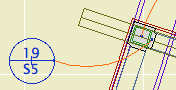
Place them using the first, single-click geometry method; you don't need to draw a box.

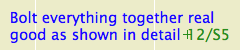
Location: Like all markers, the location doesn't matter. Markers are selected directly in the settings dialog or info box.
Place them using the first, single-click geometry method; you don't need to draw a box.
Location: 08b Windows
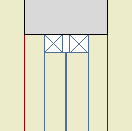
An array of screen window panels.
Horizontal Panels: Set it to zero if you want to automatically calculate the number of panels based on the Max Panel Width, or put in a number.
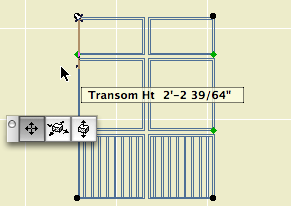
Both the rail transom heights can be edited in 3D and in section using the green nodes.
All the other parameters are identical to those of the single screen window. If the balusters are on, they will only be built in the lowest panels.

I added Rectangular options for the gutter and the downspout.
Location: 08b Windows
A simple screen panel for a screened porch. Not a screen for a window unit.
Frame Width and Thickness: Dimensions of the border trim. There are two frames, one inside and one outside, with the screen in the middle.
Balusters are optional; set the Width and Spacing. The balusters are built within the inside frame. They can have their own pen, which should be thin.
Frame and Screen Material: Obvious.
3D Cut Pen: A window hole is usually outlined with the wall's 3D pen. This parameter lets you use a different pen for the hole.
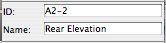
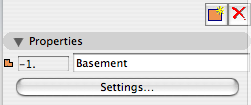
Every viewpoint has a name and an ID. The name is important and is often used for output. The ID is never used for output, but wherever possible we use the ID to help organize the project map and view map.
The behavior of IDs varies among the viewpoint types, so here's a cheat sheet.

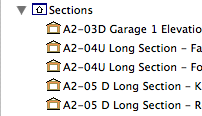

The primary Schedules have an ID to sort them to the top of the menus. Incidental schedules don't need IDs. This may change.
Cameras and paths have unique IDs that can't be changed.
Summary: Viewpoint IDs are not used for output, so use them to help sort the lists. Names are used for output: Use the name you want to see on the paper.
The IDs that do matter for output are those of the layout book items; subsets, layouts, and drawings.
Drawing IDs are usually generated by the layout, either by the grid or the order of drawings in the layout book tree.
Layout IDs are usually generated by the subset.
Subset IDs are set by the user, and the subset ID becomes part of the layout ID.
Views also have IDs, but they should typically inherit the viewpoints' IDs, so the lists will appear the same to us. All view IDs can be customized or set to 'None', but you can usually just leave them be. In the templates, I have deleted all the IDs for story (plan) views, because stuff like "-1. Basement" looks idiotic.
# Faces in Places...
Here, via Coudal. There's an Archicad one in there, what are the odds.
-James 2007-10-01-0835
