Location: 14 Conveying Systems /
This is a hydraulic residential elevator based on a product line of a real company. Since I don't know how they feel about me 'using' their 'IP', I'm not saying who it is at this time. You could probably figure it out.
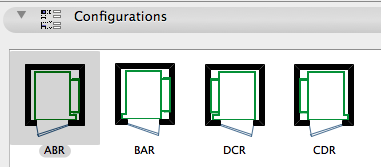
Because it's a real product line, there are limited size and configuration options. Under Cab Size there are three. Under Door Configuration there are various. Some of the door configurations offer the option to have the door hinge from the 'Track' side of the elevator or the 'Opposite' side. If this parameter doesn't apply, it is hidden.
You can choose the configuration visually under the 'Configurations' interface tab.

There is a read-only Configuration Code which is generated from the Door Configuration and the Hinge Side. This is from the product catalog.
I have provided a Standard Sizes parameter which locks the length and width to the catalog data. I wouldn't turn this off; I would rather know how big the real equipment is. The only case where I would turn it off is where I was using another manufacturer and the configurations were similar but the exact dimensions were different. Anyway, it's stretchable in principle, but the default is to be locked to the standard sizes. Turn this switch off and stretch to any impossible shape you want, YMMV.
Place the object on the bottom story of the elevator's true extent. Show the object on All Stories. Set the object's Stories Served parameter to reflect the number of actual stories the elevator will serve. The 2D symbol will not be shown above or below this range. (Though (Archicad fail) the object will still be selectable via Select All on stories where it is not visible.) The wall track which supports the cab will automatically extend through all but the top story being served by the elevator. The top story is covered by the value in the Top Rail Height parameter. This value should be roughly the top story's ceiling height. (I found in most cases that the track was too tall if it ran the whole top story.)
The Raise Cab parameter determines how many stories the cab will be raised in 3D from the home (bottom) story. This would only matter if you cut a section through the elevator shaft, and frankly it wouldn't matter much even then.

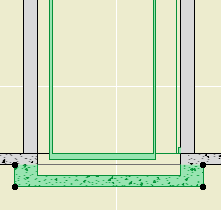
Pit.
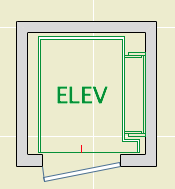
In plan, it looks like an elevator. The length and width dimensions are based on the finished dimensions of the shaft. The text bit should center in the car and it can be customized if "ELEV" doesn't suit you. There is a red (pen 10) line at the center of the door(s), and nodes at the edges of the doors. The door is not part of the object; you need to place a door in a wall normally. There are also hotspots at the center of the track and at the centerlines of the required structure for the track.
The associated pump equipment is a separate object, Elevator Equipment JM16. I also have a call box symbol for the electrical plan, Elevator Call Switch JM16.
Download (AC16)
