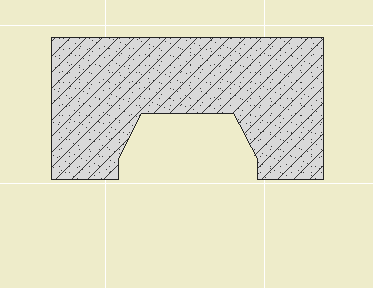
Start with a polygon wall in the shape of the firebox and chimney plan. The height should be the height of the firebox opening. The fill should be rubble, assuming stone veneer.

1 Stone polygon wall
Copy the wall in place. Resize the copy by the thickness of the veneer, say 6". Push the edges on the firebox sides out to align with the original wall. Change the pens to a different color group. I use the forties (blue). For the cut pen, instead of using 45, use 43. In the plan the lighter line will look better (though in the section in doesn't work). Change the fill to Concrete Block. Bring the inner wall forward.

2 Block polygon wall, adjusted
Subtract the inner wall from the outer wall. This makes the section nice.
Place a Firebox Lining JM9 object to align with the firebox shape. Use the fill Brick, Fire for the section fill. Use Misc - Fire Brick for the material. The top of the object should be at the top of the firebox opening. For now, you can put the bottom at the level of the hearth; you might change it in section later.

3 Firebox Lining object
Subtract the firebox lining object from the inner, concrete block wall.
In 3D:

You can use a plain rubble polygon wall by itself at first. But this technique is so simple, I would apply it sooner than later. The detailed 3D components (flues, etc) can wait a while longer.
Related:
Chimney/Fireplace 2: Chimney in Plan and 3D
Chimney/Fireplace 3: Flues
Chimney/Fireplace 4: Hearth Structure
Chimney/Fireplace 5: Chimney Top JM11
