On Land

Environment Information
At Rill Architects we run ArchiCAD on macOS. If you work at Rill, this is your stuff. If you don't, but you work in ArchiCAD, you may find something interesting. Anybody else, I don't know.
RSS
Labels Archive

Location: 01 General / 1 Graphic Symbols

Shape Tag
A shape with a text block in it. While working on the labels in 19 post, I realized I had never posted the recent updates or the label version.

The shapes are square, rectangle, triangle, circle, ellipse, oval, diamond, hexagon, pointed box, and roundrect. The roundrect has authentic iOS proportions.

The rectangle, oval, hexagon, and roundrect will elongate to accommodate the text, if the Stretch for Text parameter is on. The square will turn into a rectangle.

The Height parameter refers to the vertical dimension. The Length Factor parameter is multiplied by the height to get the length of the rectangle, ellipse, oval, and roundrect shapes. If Stretch for Text is on, the length is overridden by the text length.

The text, by default, is the global ID of the object. You can also choose to enter a custom text.

The size of the text can be set by points, millimeters, or as a fraction of the shape height. All these parameters are hooked together, so when you switch among them the actual height stays the same.

There is a value list for the font, and you can enter any font name. The text can be shown bold, italic, underlined, or any combination.

The Mask parameter will make the shape opaque white, using the 'Solid' Fill and White Pen parameters.

The Shape Label is simply a label version of the same thing. When placed as an associated label, the ID displayed is that of the labeled element. Placed independently, you need custom text.

Download here.

This is the main, simple text label for associated labeling of objects. It has one parameter, "Parameter to List". Put in the variable name of any text parameter in any object. The default is "desList". I'm using this name as a standard in many objects across the library. So you can put in any parameter name, but for many typical cases you can leave it alone.

Some objects will need more complex, customized labels, which we'll develop as we go along.

(To find the variable name of a parameter: Select the object you want to label and press Cmd+Option+O. (File -> GDL Objects -> Open Object) Find the parameter in the parameter list in the master window. The variable name is the first text column. It's an unfriendly-looking (probably) word-like thing.)

Objects that can be labeled using the "desList" parameter:

Wood Beam JAM9
Column Wood JAM9
Column Steel JAM9
Steel W Shape JAM9
Bent W Shape JAM9
Tuscan Column JAM9
RiserMeter JAM9

UPDATE: I added a list to the 'Parameter to List' parameter. In addition to desList, there's 'typeList', the 'Type for List' parameter of the crown tool, where you can put in a description of the crown, such as 'Type 1'. There's also 'crnDes', which is the name of the crown shape in the crown tool. With these parameters, you can label crown elements in the RCP.

You can still use any parameter name, not just the listed ones.

I also added a read-only description of each of the listed parameters.

Original date: 2004-12-15

A label to show the elevation of the top or bottom of a slab.

It works in plan or in section, and changes its form depending on which kind of window it's in. It can give the elevation to project zero or the home story of the slab.

I made it in an attempt to overcome one of the big limitations of the Level Dimension tool: It can't read the bottom of an element. If you can read the bottom of an element, you can show live ceiling height dimensions in the RCP. I'm also attempting to overcome one of the big limitations of the level version of the regular dimension tool in section: It isn't truly associative and doesn't move when the slab does.

In creating this label, I discovered and did mortal combat with several disabilities in Archicad, and especially in the label functionality. In the end, it doesn't do nearly what I want it to, but it's (mostly) not my fault. The section version works well for showing ceiling heights, as long as the slab is on the same story as the room. To use the plan version in RCP, my original primary goal, involves additional layers, or commits me to fussier modeling of ceilings than is otherwise needed, and is tedious to maintain.

(I wrote a mini-white-paper mapping the related Archicad disabilities on Archicad Talk, if you're interested, here it is.)

So even though the plan version has three broken legs, the section version is passable, so here it is.

Use it as an associated label, of course. Choose to label the top or bottom, to project zero or the home story zero.

In plan, you should only use it to label the bottom of a slab; for the top, the level dim is far superior, since it can read hidden elements.

The plan text can moved anywhere, and will flip around depending on what quadrant it's in. Sorry about the separate X & Y editing hotspots, for some reason they can't coincide in labels. I regrouped and got it working; the current version is for AC10 or above.

When placing the label in section, it will always appear at the lower left corner of the slab. If you are dimensioning the top, you need to move the label manually.

Download (AC10)

For labeling doors and windows in section/elevation. This is completely different from the dimension marker used in plan.

It is intended to be used as an associated label.

How about a quick review of associated labels. To place an associated label, select the element, in the window you want the label, and Check 'label Elements' in the Info Box. Which label will be placed? Ah. Each tool has default label settings, which are configured in the Label settings dialog. For each tool you want to label, highlight it in the list at the top and choose the appropriate label from the top right flyout. This is also where you set the pen, layer, and other attributes of the label. Remember that labels can have a different layer than the elements they reference, and they usually will.

For doors and windows, starting today, set the label tool to use Door-Window Label JM9.

It draws a hexagon for windows and an ellipse for doors. It knows the difference! If Auto Size is on, the window tag will be 5/16" and the door tag will be 3/8". If these don't meet you needs, turn Auto Size off.

Once the label is placed, move it where you want it. (A method to control where labels pop up remains elusive.) Place the label on a sash with no divisions, or to the side of the window/door. Try not to obscure the design of the window/door.

See also:
Labels

Location: 01 General / 1 Graphic Symbols

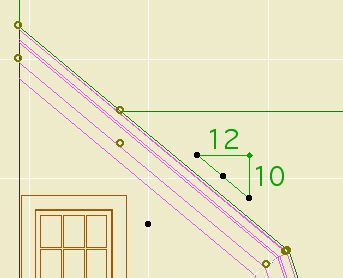
Just like Slope Symbol JAM8, except it's a label. Used as associated label on a roof, it will convert the slope to n/12 and draw the triangle correctly. This symbol is typically used in section and elevation, but I could see using it in the roof plan.

Select the roof you want to label and check 'Label Elements' in the Info Box.

(To set the label tool to use this label on roofs, go to the default settings of the label tool, highlight Roof Tool in the top panel, and select Roof Slope JAM9 from the flyout.)

After activating the label, you will have to move it into position. Make sure "Use Symbol Arrow" is checked in the Info Box. This keeps the leader from being drawn.

To label a roof which slopes in the other direction, switch the "Mirror" parameter to On. Conventional mirroring doesn't work.


You can stretch the length using the green node.

The hypotenuse is optional for outsiders. In our standards it is on.

Download

See Also: Labels

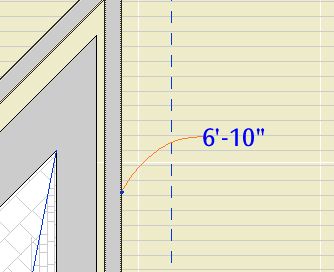
The label gives the height of a wall. It will typically be used for knee walls. It can be used in section or in plan. It will only work as an associated label; select the wall and check the "Label Elements" box.

The value displayed is the height of the wall in the settings. This means that for trimmed walls, you have to "Set wall height to highest point" when trimming, or manually set the wall height to an appropriate value. Tip: trim the wall using "highest point", then round the height UP to the next 1/4", 1/2", or whole inch.


See Also: Labels